FastAPI로 완벽한 블로그 만들기: 댓글 답글 기능
Takashi Yamamoto
Infrastructure Engineer · Leapcell
이전 글에서 FastAPI 블로그에 기본적인 댓글 시스템을 추가하여 사용자가 게시물에 대해 토론할 수 있도록 했습니다.
하지만 이러한 댓글은 단방향이었습니다. 다른 사람들은 당신의 게시물에 댓글을 달 수 있었지만, 당신은 그들의 댓글에 답글을 달 수 없었습니다.
이 글에서는 댓글 섹션을 더 상호작용적으로 만들기 위해 블로그에 댓글 답글 기능을 구현할 것입니다. 사용자는 기존 댓글에 답글을 달 수 있으며, 이러한 답글은 계층적 관계를 명확하게 보여주기 위해 중첩된(또는 들여쓰기된) 형식으로 표시됩니다.
1단계: 데이터 모델 업데이트
답글 기능을 구현하려면 댓글 간에 부모-자식 관계를 설정해야 합니다. 답글은 본질적으로 댓글이지만 "부모 댓글"이 있습니다. Comment 모델에 자체 참조 관계를 추가하여 이를 달성할 것입니다.
1. Comment 모델 수정
models.py 파일을 열고 Comment 모델에 parentId, parent, replies 속성을 추가합니다.
# models.py
import uuid
from datetime import datetime
from typing import Optional, List
from sqlmodel import Field, SQLModel, Relationship

class User(SQLModel, table=True):
    id: Optional[uuid.UUID] = Field(default_factory=uuid.uuid4, primary_key=True)
    username: str = Field(unique=True, index=True)
    password: str
    comments: List["Comment"] = Relationship(back_populates="user")

class Post(SQLModel, table=True):
    id: Optional[uuid.UUID] = Field(default_factory=uuid.uuid4, primary_key=True)
    title: str
    content: str
    createdAt: datetime = Field(default_factory=datetime.utcnow, nullable=False)
    comments: List["Comment"] = Relationship(back_populates="post")

class Comment(SQLModel, table=True):
    id: Optional[uuid.UUID] = Field(default_factory=uuid.uuid4, primary_key=True)
    content: str
    createdAt: datetime = Field(default_factory=datetime.utcnow, nullable=False)

    postId: uuid.UUID = Field(foreign_key="post.id")
    userId: uuid.UUID = Field(foreign_key="user.id")

    post: Post = Relationship(back_populates="comments")
    user: User = Relationship(back_populates="comments")

    # --- New Fields ---

    # Stores the parent comment's ID, can be null
    parentId: Optional[uuid.UUID] = Field(default=None, foreign_key="comment.id")

    # Defines the relationship with the parent comment
    # sa_relationship_kwargs helps SQLAlchemy correctly handle the self-referencing relationship
    parent: Optional["Comment"] = Relationship(
        back_populates="replies",
        sa_relationship_kwargs=dict(remote_side="Comment.id")
    )

    # Defines the relationship with the list of child comments (replies)
    replies: List["Comment"] = Relationship(back_populates="parent")
parentId:comment테이블 자체의id를 가리키는 선택적 필드입니다. 최상위 댓글의 경우parentId는None이 됩니다.parent및replies:Relationship을 사용하여Comment모델 내에서 부모-자식 관계를 정의합니다. 이를 통해comment.replies를 통해 댓글에 대한 모든 답글에 쉽게 액세스할 수 있습니다.
main.py에서 create_db_and_tables 함수를 구성하여 모델 변경 사항을 자동으로 감지하고 애플리케이션 시작 시 데이터베이스 스키마를 업데이트하므로 SQL을 수동으로 실행할 필요가 없습니다.
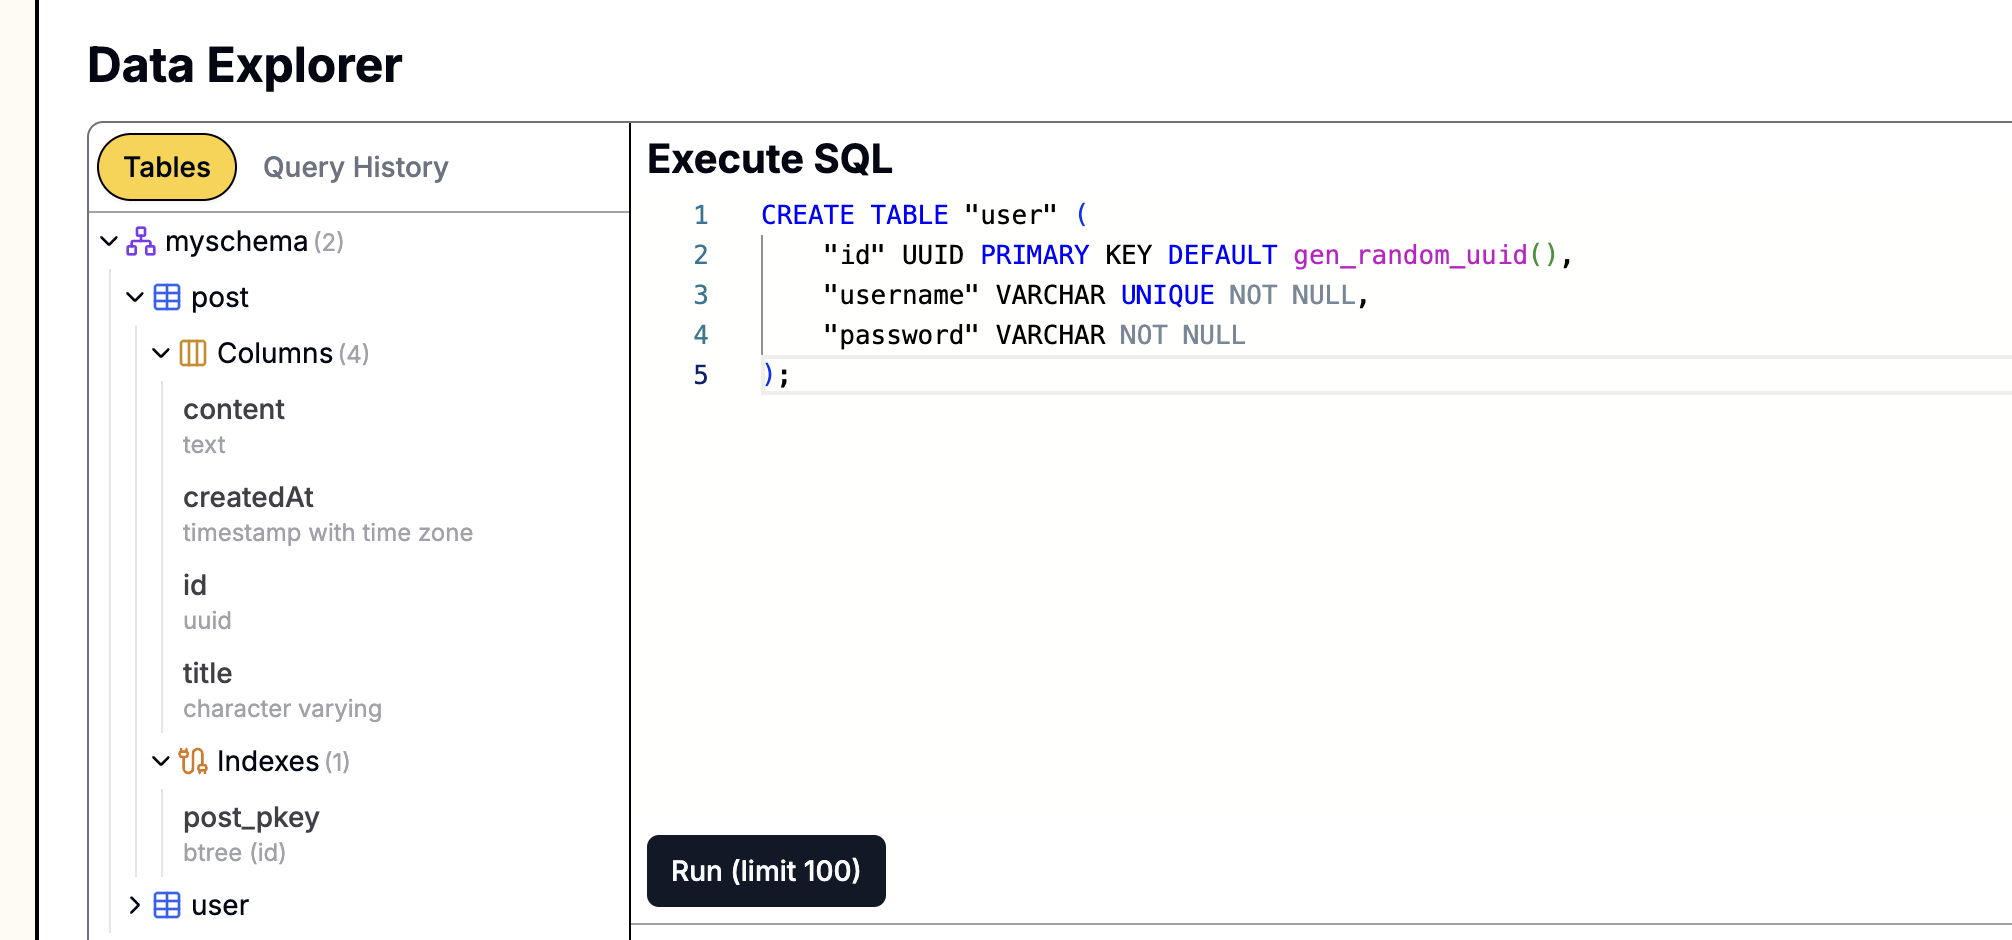
수동으로 SQL을 실행해야 하고 데이터베이스가 Leapcell에 생성된 경우,

웹사이트의 데이터베이스 관리 페이지로 이동하여 SQL 인터페이스에 문장을 붙여넣고 실행하여 그래픽 인터페이스를 통해 쉽게 SQL 문을 실행할 수 있습니다.
2단계: 댓글 서비스 조정
서비스 계층은 새 댓글을 만들 때 부모 댓글을 연결하고 쿼리할 때 댓글의 평면 목록을 트리와 같은 구조로 구성하도록 조정해야 합니다. comments_service.py를 열고 다음 변경 사항을 적용합니다.
# comments_service.py
import uuid
from typing import List, Optional
from sqlmodel import Session, select
from models import Comment

def structure_comments(comments: List[Comment]) -> List[Comment]:
    """Converts a flat list of comments into a tree structure"""
    comment_map = {}
    # First, initialize the replies list and put all comments into a map for quick lookup
    for comment in comments:
        comment.replies = []
        comment_map[comment.id] = comment

    root_comments = []
    # Iterate through the comments to build the parent-child relationships
    for comment in comments:
        if comment.parentId:
            parent_comment = comment_map.get(comment.parentId)
            if parent_comment:
                parent_comment.replies.append(comment)
        else:
            root_comments.append(comment)

    return root_comments

def get_comments_by_post_id(post_id: uuid.UUID, session: Session) -> List[Comment]:
    """Finds all comments for a post and structures them into a tree"""
    statement = select(Comment).where(Comment.postId == post_id).order_by(Comment.createdAt)
    comments = session.exec(statement).all()
    # Return the structured comment tree
    return structure_comments(comments)

def create_comment(
    content: str,
    user_id: uuid.UUID,
    post_id: uuid.UUID,
    session: Session,
    parent_id: Optional[uuid.UUID] = None  # Add an optional parent_id parameter
) -> Comment:
    """Creates a new comment, optionally linking it to a parent comment"""
    new_comment = Comment(
        content=content,
        userId=user_id,
        postId=post_id,
        parentId=parent_id  # Set the parentId
    )
    session.add(new_comment)
    session.commit()
    session.refresh(new_comment)
    return new_comment
로직 설명:
get_comments_by_post_id는 이제 게시물에 대한 모든 댓글(최상위 댓글 및 답글)을 가져온 다음structure_comments를 호출하여 처리합니다.- 새로운
structure_comments메서드는 이 로직의 핵심입니다. 모든 댓글을 반복합니다. 댓글에parentId가 있는 경우 해당 부모의replies배열에 배치되고, 그렇지 않으면 최상위 댓글이 됩니다. 함수는 궁극적으로 모든 최상위 댓글 목록을 반환하며, 각 댓글은 잠재적으로 중첩된 답글 목록을 포함합니다. create_comment메서드는 선택적parent_id매개변수를 추가합니다. 이 ID가 제공되면 새로 생성된 댓글은 해당 부모 댓글과 연결됩니다.
3단계: 라우트 업데이트
컨트롤러는 요청 본문에서 선택적 parentId를 수신하여 서비스로 전달해야 합니다. 이 변경은 매우 간단합니다.
routers/comments.py를 엽니다.
# routers/comments.py
import uuid
from typing import Optional
from fastapi import APIRouter, Depends, Form
from fastapi.responses import RedirectResponse
from sqlmodel import Session

from database import get_session
import comments_service
from auth_dependencies import login_required

router = APIRouter()

@router.post("/posts/{post_id}/comments")
def create_comment_for_post(
    post_id: uuid.UUID,
    content: str = Form(...),
    parentId: Optional[str] = Form(None), # <-- Receive optional parentId
    user: dict = Depends(login_required),
    session: Session = Depends(get_session)
):
    user_id = uuid.UUID(user["id"])

    # Convert parentId to UUID type if it exists
    parent_uuid = uuid.UUID(parentId) if parentId else None

    comments_service.create_comment(
        content=content,
        user_id=user_id,
        post_id=post_id,
        session=session,
        parent_id=parent_uuid # Pass parent_id to the service
    )

    return RedirectResponse(url=f"/posts/{post_id}", status_code=302)
4단계: 프론트엔드 보기 업그레이드
이것은 가장 많은 변경 사항이 있는 부분입니다. 댓글과 답글을 재귀적으로 렌더링하도록 post.html 템플릿을 업데이트해야 합니다. 또한 동적으로 답글 양식을 표시하는 JavaScript를 추가해야 합니다.
1. 댓글 템플릿 만들기
댓글의 재귀 렌더링을 달성하기 위해 재사용 가능한 "매크로"를 만드는 것이 가장 좋습니다.
templates 디렉토리에 _comment.html이라는 새 파일을 만듭니다.
{# templates/_comment.html #}
{% macro render_comment_tree(comments, user, post, depth) %}
  {% for comment in comments %}
    <div class="comment-item" style="margin-left: {{ depth * 20 }}px;">
      <p class="comment-content">{{ comment.content }}</p>
      <small>
        By <strong>{{ comment.user.username }}</strong> on {{ comment.createdAt.strftime('%Y-%m-%d') }}
      </small>
      {% if user %}
        <button class="reply-btn" data-comment-id="{{ comment.id }}">Reply</button>
      {% endif %}
    </div>

    {# Recursively call itself to render replies #}
    {% if comment.replies %}
      {{ render_comment_tree(comment.replies, user, post, depth + 1) }}
    {% endif %}
  {% endfor %}
{% endmacro %}
이 템플릿은 render_comment_tree라는 매크로를 정의합니다. 이 매크로는 주어진 comments 배열을 반복하고 각 댓글의 replies 배열에 대해 재귀적으로 자체를 호출하며 depth를 증가시켜 시각적 들여쓰기를 만듭니다.
2. post.html 업데이트
이제 templates/post.html을 수정하여 이 새 매크로를 사용하고 해당 JavaScript 로직으로 범용 답글 양식을 추가합니다.
{# templates/post.html #} {# ... post content section ... #} <div class="post-content">{{ post.content | replace('\n', '<br>') | safe }}</div> </article> {# Import the macro #} {% from '_comment.html' import render_comment_tree %} <section class="comments-section"> <h3>Comments</h3> <div class="comment-list"> {% if comments %} {# Call the macro to render the comment tree #} {{ render_comment_tree(comments, user, post, 0) }} {% else %} <p>No comments yet. Be the first to comment!</p> {% endif %} </div> {% if user %} <form id="comment-form" action="/posts/{{ post.id }}/comments" method="POST" class="comment-form"> <h4>Leave a Comment</h4> <div class="form-group"> <textarea name="content" rows="4" placeholder="Write your comment here..." required></textarea> {# Add a hidden parentId input field #} <input type="hidden" name="parentId" id="parentIdInput" value="" /> </div> <button type="submit">Submit Comment</button> <button type="button" id="cancel-reply-btn" style="display: none;">Cancel Reply</button> </form> {% else %} <p><a href="/auth/login">Login</a> to leave a comment.</p> {% endif %} </section> <script> document.addEventListener('DOMContentLoaded', () => { const commentForm = document.getElementById('comment-form'); const parentIdInput = document.getElementById('parentIdInput'); const formTitle = commentForm.querySelector('h4'); const cancelReplyBtn = document.getElementById('cancel-reply-btn'); const commentList = document.querySelector('.comment-list'); commentList.addEventListener('click', (e) => { if (e.target.classList.contains('reply-btn')) { const commentId = e.target.getAttribute('data-comment-id'); const commentItem = e.target.closest('.comment-item'); // Move the form to be directly below the comment being replied to commentItem.after(commentForm); // Set the parentId and update the form title parentIdInput.value = commentId; formTitle.innerText = 'Replying to ' + commentItem.querySelector('strong').innerText; cancelReplyBtn.style.display = 'inline-block'; } }); cancelReplyBtn.addEventListener('click', () => { // Reset the form state parentIdInput.value = ''; formTitle.innerText = 'Leave a Comment'; cancelReplyBtn.style.display = 'none'; // Move the form back to the bottom of the comments section document.querySelector('.comments-section').appendChild(commentForm); }); }); </script> <a href="/" class="back-link">← Back to Home</a> {% include "_footer.html" %}
JavaScript 로직 설명:
- 페이지에는 댓글 양식이 하나만 있습니다.
- 사용자가 댓글의 "Reply" 버튼을 클릭하면 JavaScript는 해당 댓글의 ID를 가져와 양식의 숨겨진
parentId입력 필드의 값으로 설정합니다. - 동시에 양식 전체를 답글이 달리는 댓글 바로 아래로 이동시키고 양식 제목을 업데이트하여 사용자에게 명확한 컨텍스트를 제공합니다.
- 답글을 달 때 "Cancel Reply" 버튼이 나타납니다. 이 버튼을 클릭하면 양식이 재설정되고 댓글 섹션 맨 아래로 다시 이동합니다.
실행 및 테스트
이제 애플리케이션을 다시 시작합니다.
uvicorn main:app --reload
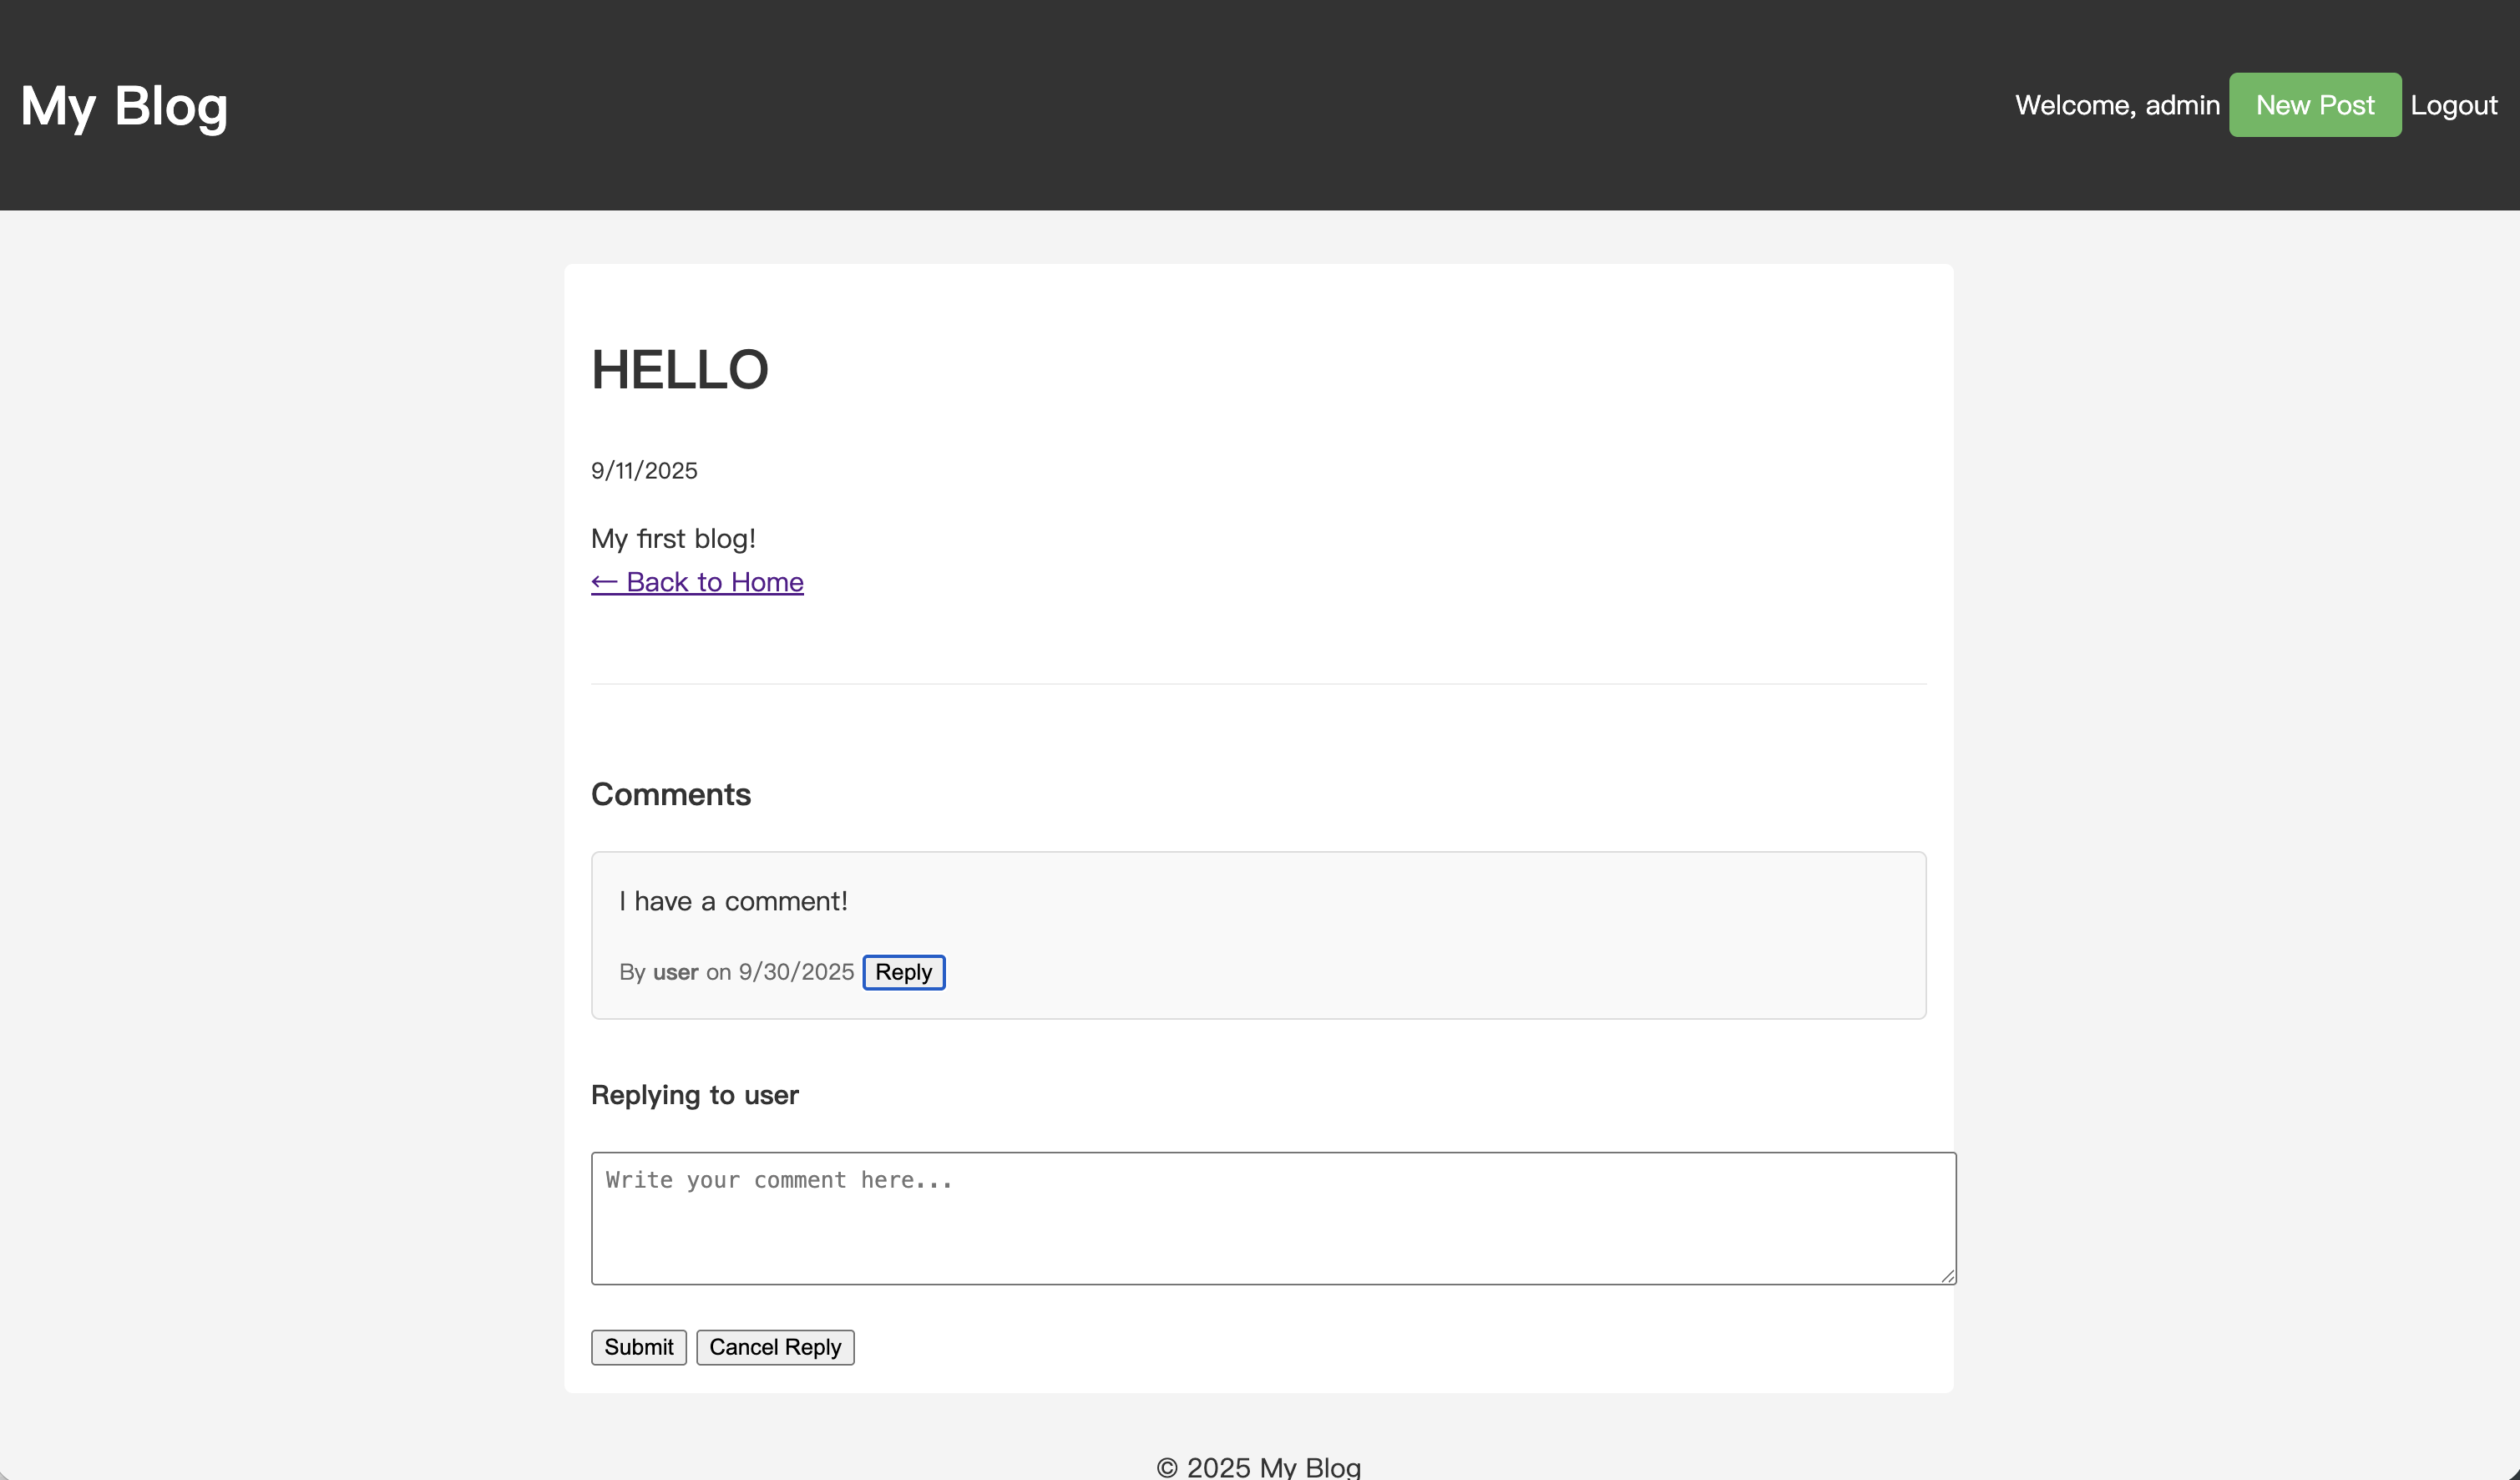
브라우저를 열고 원하는 게시물의 상세 페이지로 이동합니다. 댓글을 찾아 그 옆의 "Reply" 버튼을 클릭합니다.
그러면 댓글 아래로 댓글 양식이 이동하는 것을 볼 수 있습니다.
내용을 입력하고 제출합니다. 페이지가 새로고침된 후에는 부모 댓글 아래에 들여쓰기되어 답글이 나타나는 것을 볼 수 있습니다.
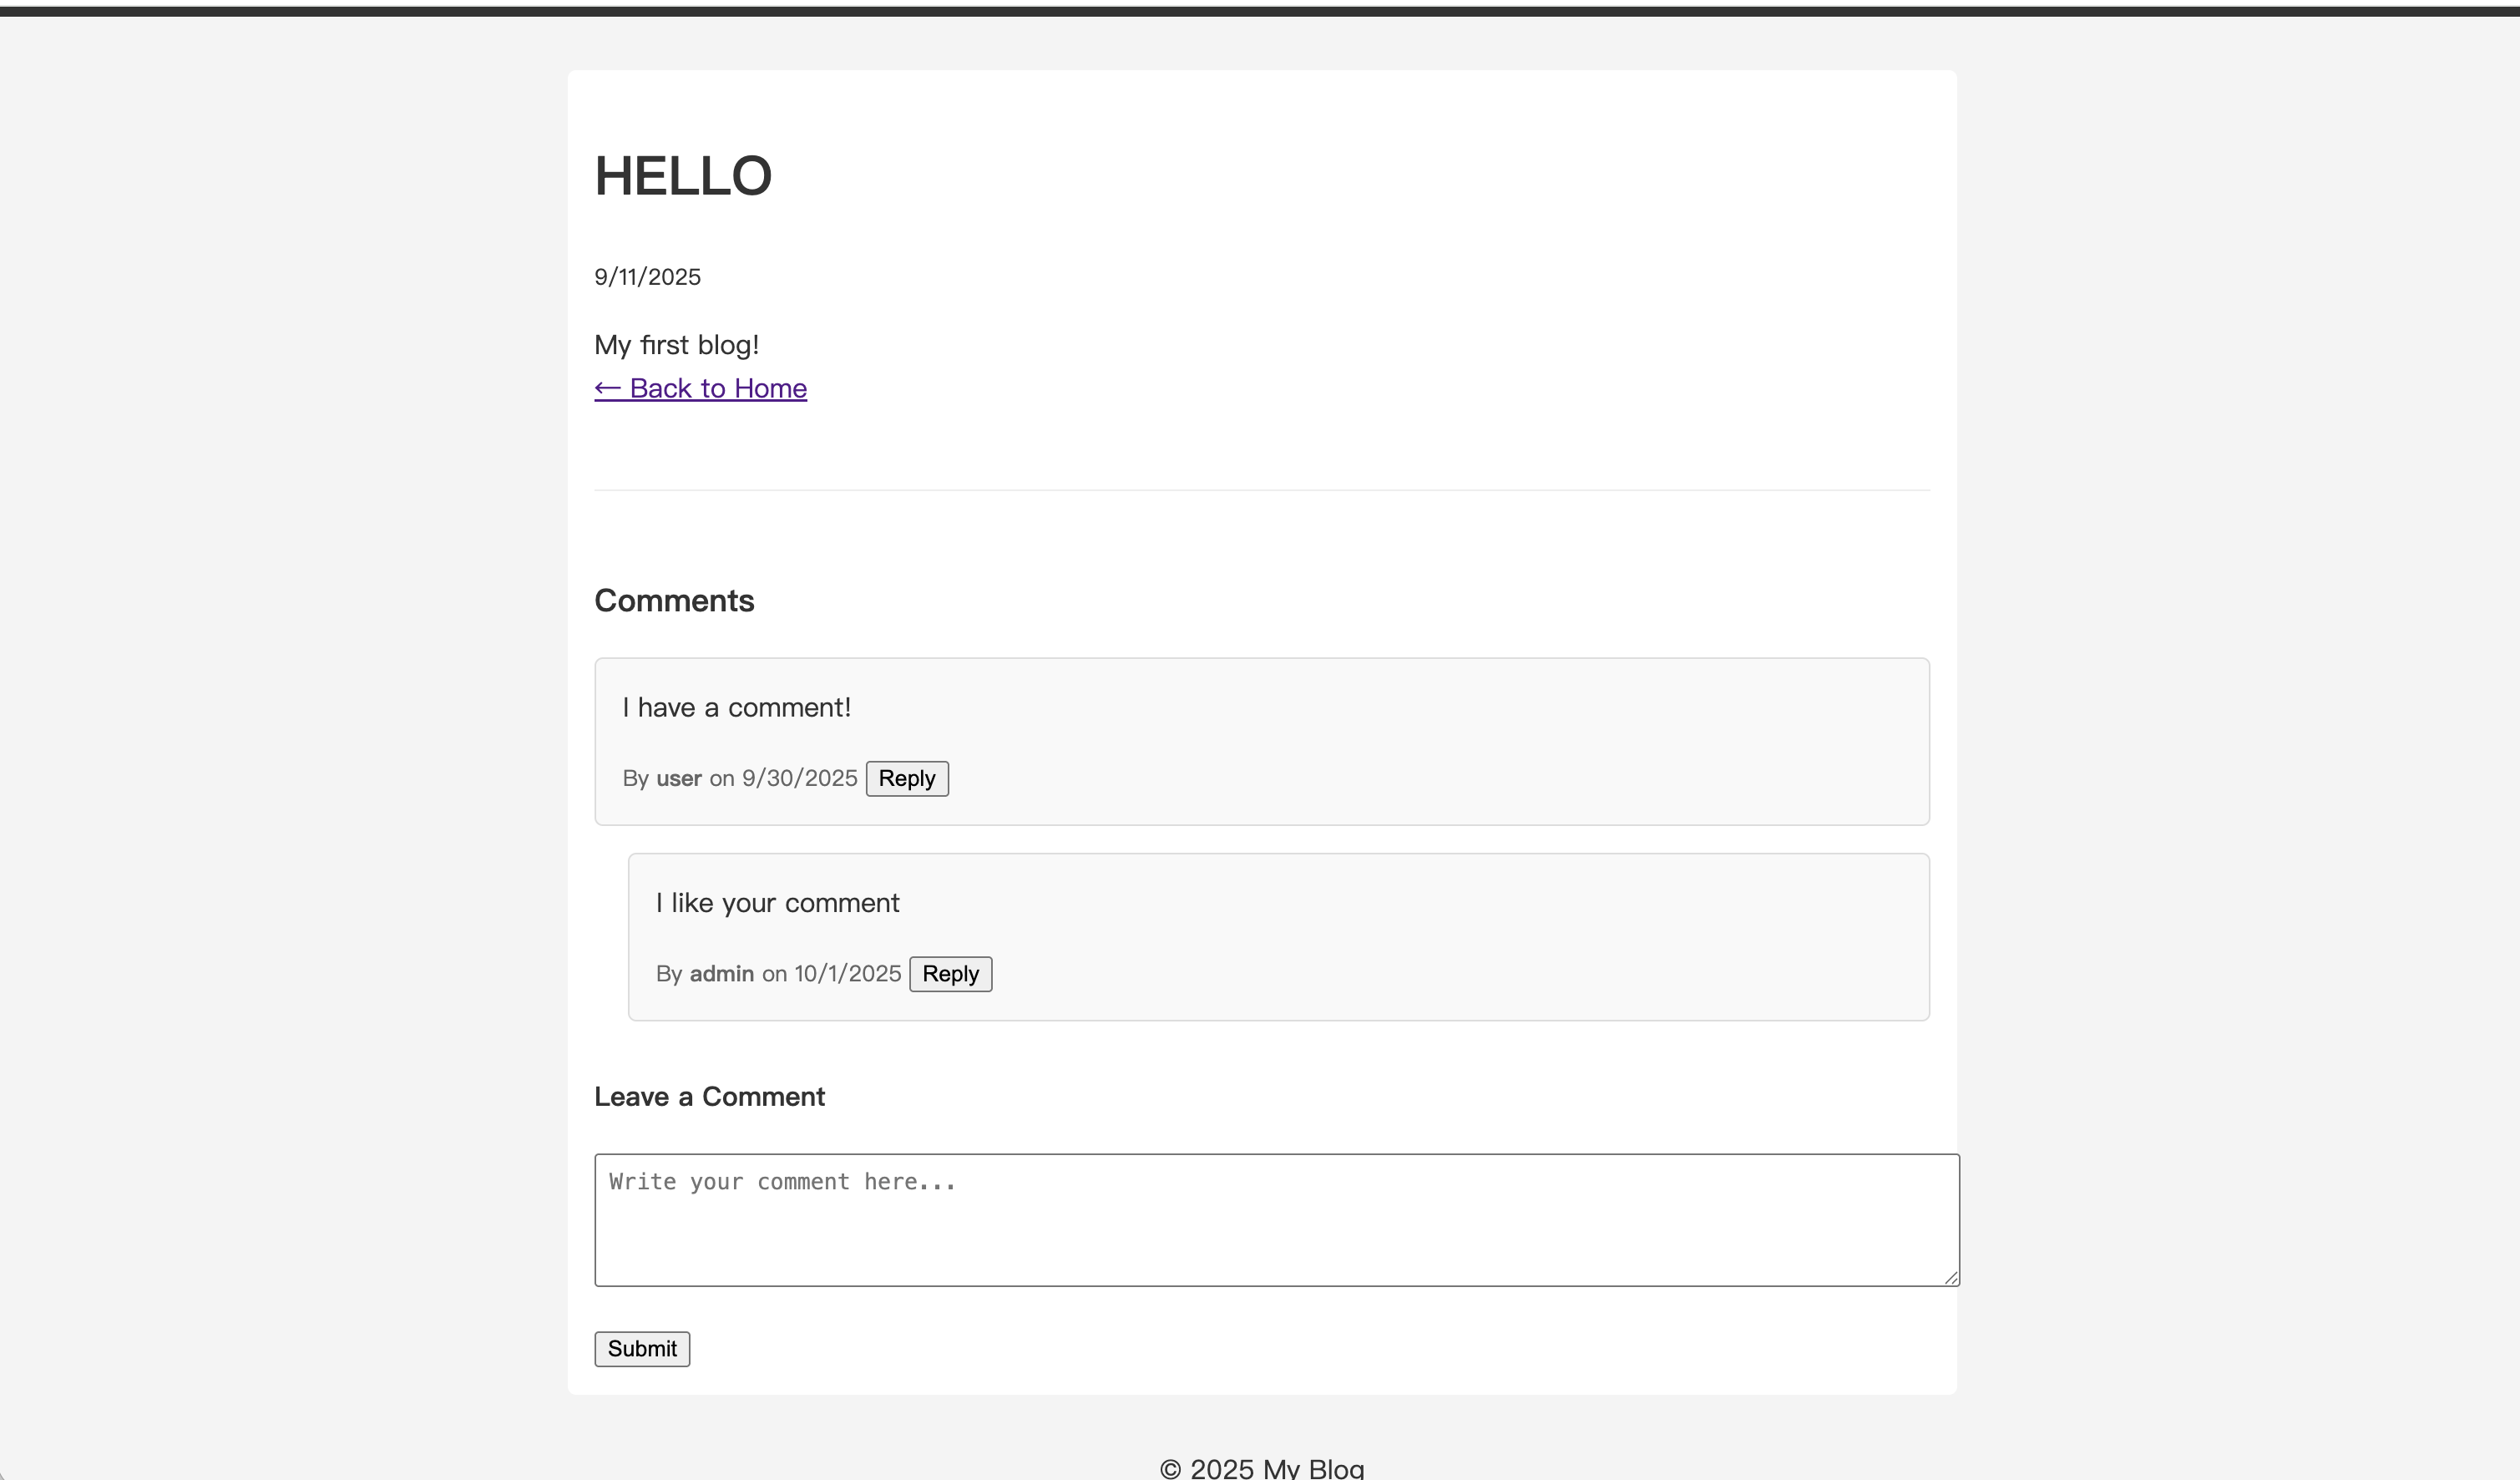
답글에 계속 답글을 달면서 여러 단계의 대화를 만들 수 있습니다.
이제 완전한 댓글 답글 시스템이 준비되었습니다.