Build a Docusaurus-like Site with FastAPI: Step 2 - Render Markdown
James Reed
Infrastructure Engineer · Leapcell
In the previous article, we set up a FastAPI service and used Jinja2 to render a dynamic HTML template.
But if you've used other documentation site tools, you'll know they all work by writing Markdown, which they then use to generate HTML content, rather than writing HTML by hand.
In this article, we will implement this exact feature: reading a local .md file, parsing it into HTML, and injecting it into our web template.
Step 1: Install a Markdown Parsing Library
We need a tool to convert Markdown text into an HTML string. A popular library for this is python-markdown.
Install it by running the following command:
pip install markdown
Step 2: Create Our First Markdown Document
By convention, we will store all our source documents in a new docs/ folder.
First, create a docs folder in your project's root directory, and then create a hello.md file inside it.
Updated project structure:
fastapi-docs-site/
├── docs/               <-- New
│   └── hello.md        <-- New
├── main.py
├── static/
└── templates/
Edit docs/hello.md:
Open this new file and write some Markdown content so we can test it later.
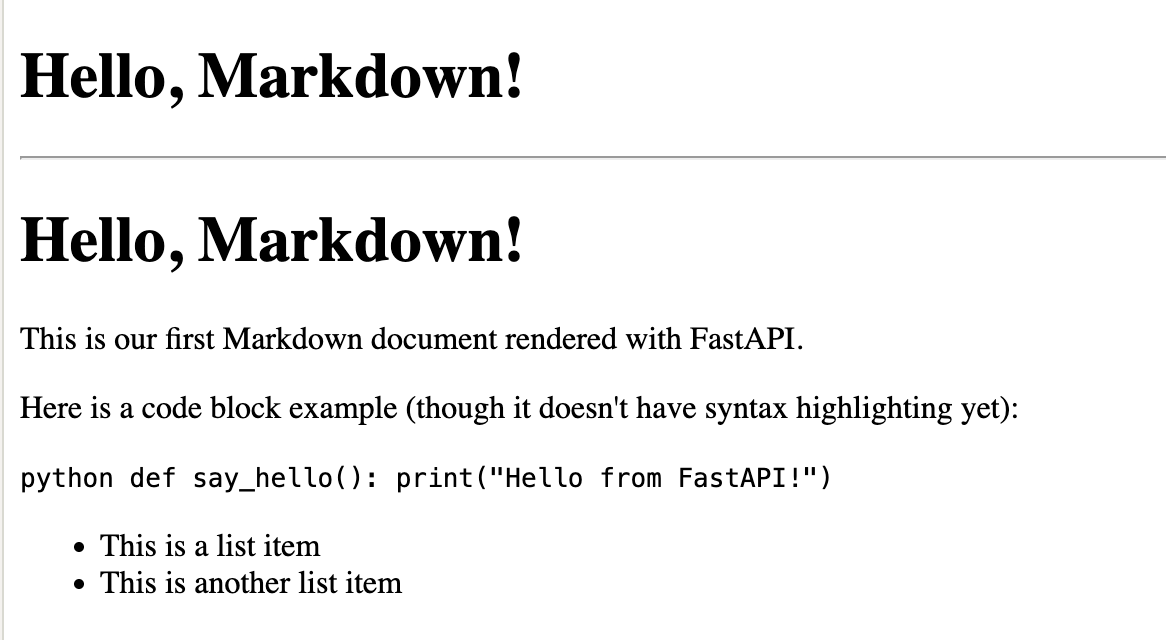
# Hello, Markdown!

This is our first Markdown document rendered with FastAPI.

Here is a code block example (though it doesn't have syntax highlighting yet):

```python
def say_hello():
    print("Hello from FastAPI!")
```

  - This is a list item
  - This is another list item
Step 3: Create a Template for Rendering Documents
The templates/index.html we created in the last article is our homepage. Now, we need a dedicated template to display the content of this Markdown file.
Create a new file in the templates/ folder named doc.html.
<!DOCTYPE html>
<html lang="en">
  <head>
    <meta charset="UTF-8" />
    <meta name="viewport" content="width=device-width, initial-scale=1.0" />
    <title>{{ page_title }} - My Docs Site</title>
  </head>
  <body>
    <h1>{{ page_title }}</h1>

    <hr />

    <div class="doc-content">{{ content | safe }}</div>
  </body>
</html>
{{ content | safe }} tells Jinja2: "The content in this content variable is safe HTML. Please render it directly and do not escape it."
Step 4: Create the Markdown Rendering Route
Next, let's modify main.py to add a new route for our Markdown file, for example, /docs/hello.
It will perform the following actions:
- Read the contents of the
docs/hello.mdfile. - Import the
markdownlibrary. - Use the
markdown.markdown()function to convert the file content into an HTML string. - Pass this HTML string as the
contentvariable to thedoc.htmltemplate.
Open main.py and modify it as follows:
# main.py
from fastapi import FastAPI, Request
from fastapi.templating import Jinja2Templates
from fastapi.responses import HTMLResponse
import markdown  # 1. Import the markdown library

app = FastAPI()

templates = Jinja2Templates(directory="templates")


# --- This is the homepage route from the previous article ---
@app.get("/", response_class=HTMLResponse)
async def root(request: Request):
    """
    Root route, returns the rendered HTML template
    """
    context = {
        "request": request,
        "page_title": "Hello, Jinja2!"
    }
    return templates.TemplateResponse("index.html", context)


# --- 2. This is our new documentation route ---
@app.get("/docs/hello", response_class=HTMLResponse)
async def get_hello_doc(request: Request):
    """
    Read, parse, and render the hello.md document
    """

    # 3. Hard-code the path to the Markdown file
    # (We will make this dynamic in a future article)
    md_file_path = "docs/hello.md"

    try:
        with open(md_file_path, "r", encoding="utf-8") as f:
            md_content = f.read()
    except FileNotFoundError:
        # Simple error handling
        return HTMLResponse(content="<h1>404 - Document not found</h1>", status_code=404)

    # 4. Use the markdown library to convert it to HTML
    html_content = markdown.markdown(md_content)

    # 5. Prepare the template context
    #    Note that we are now rendering doc.html
    context = {
        "request": request,
        "page_title": "Hello, Markdown!", # Temporarily hard-coded title
        "content": html_content         # Pass in the converted HTML
    }

    return templates.TemplateResponse("doc.html", context)
Step 5: Run and Test
Start your server by running uvicorn main:app --reload.
In your browser, visit this URL: http://127.0.0.1:8000/docs/hello
You should see the content of docs/hello.md successfully rendered as an HTML page!
Deploying the Project Online
A docs site is meant to be visited by everyone, so just running it locally isn't enough. Next, we can deploy it online.
A simple deployment option is to use Leapcell. It's a web app hosting platform that can host projects in various languages and frameworks, including FastAPI, of course.

Follow the steps below:
1.Register an account on the website.
2.Commit your project to GitHub. You can refer to GitHub's official documentation for the steps. Leapcell will pull the code from your GitHub repository later.
3.Click "Create Service" on the Leapcell page.

4.After choosing your FastAPI repo, you'll see Leapcell has auto-populated the necessary configurations.
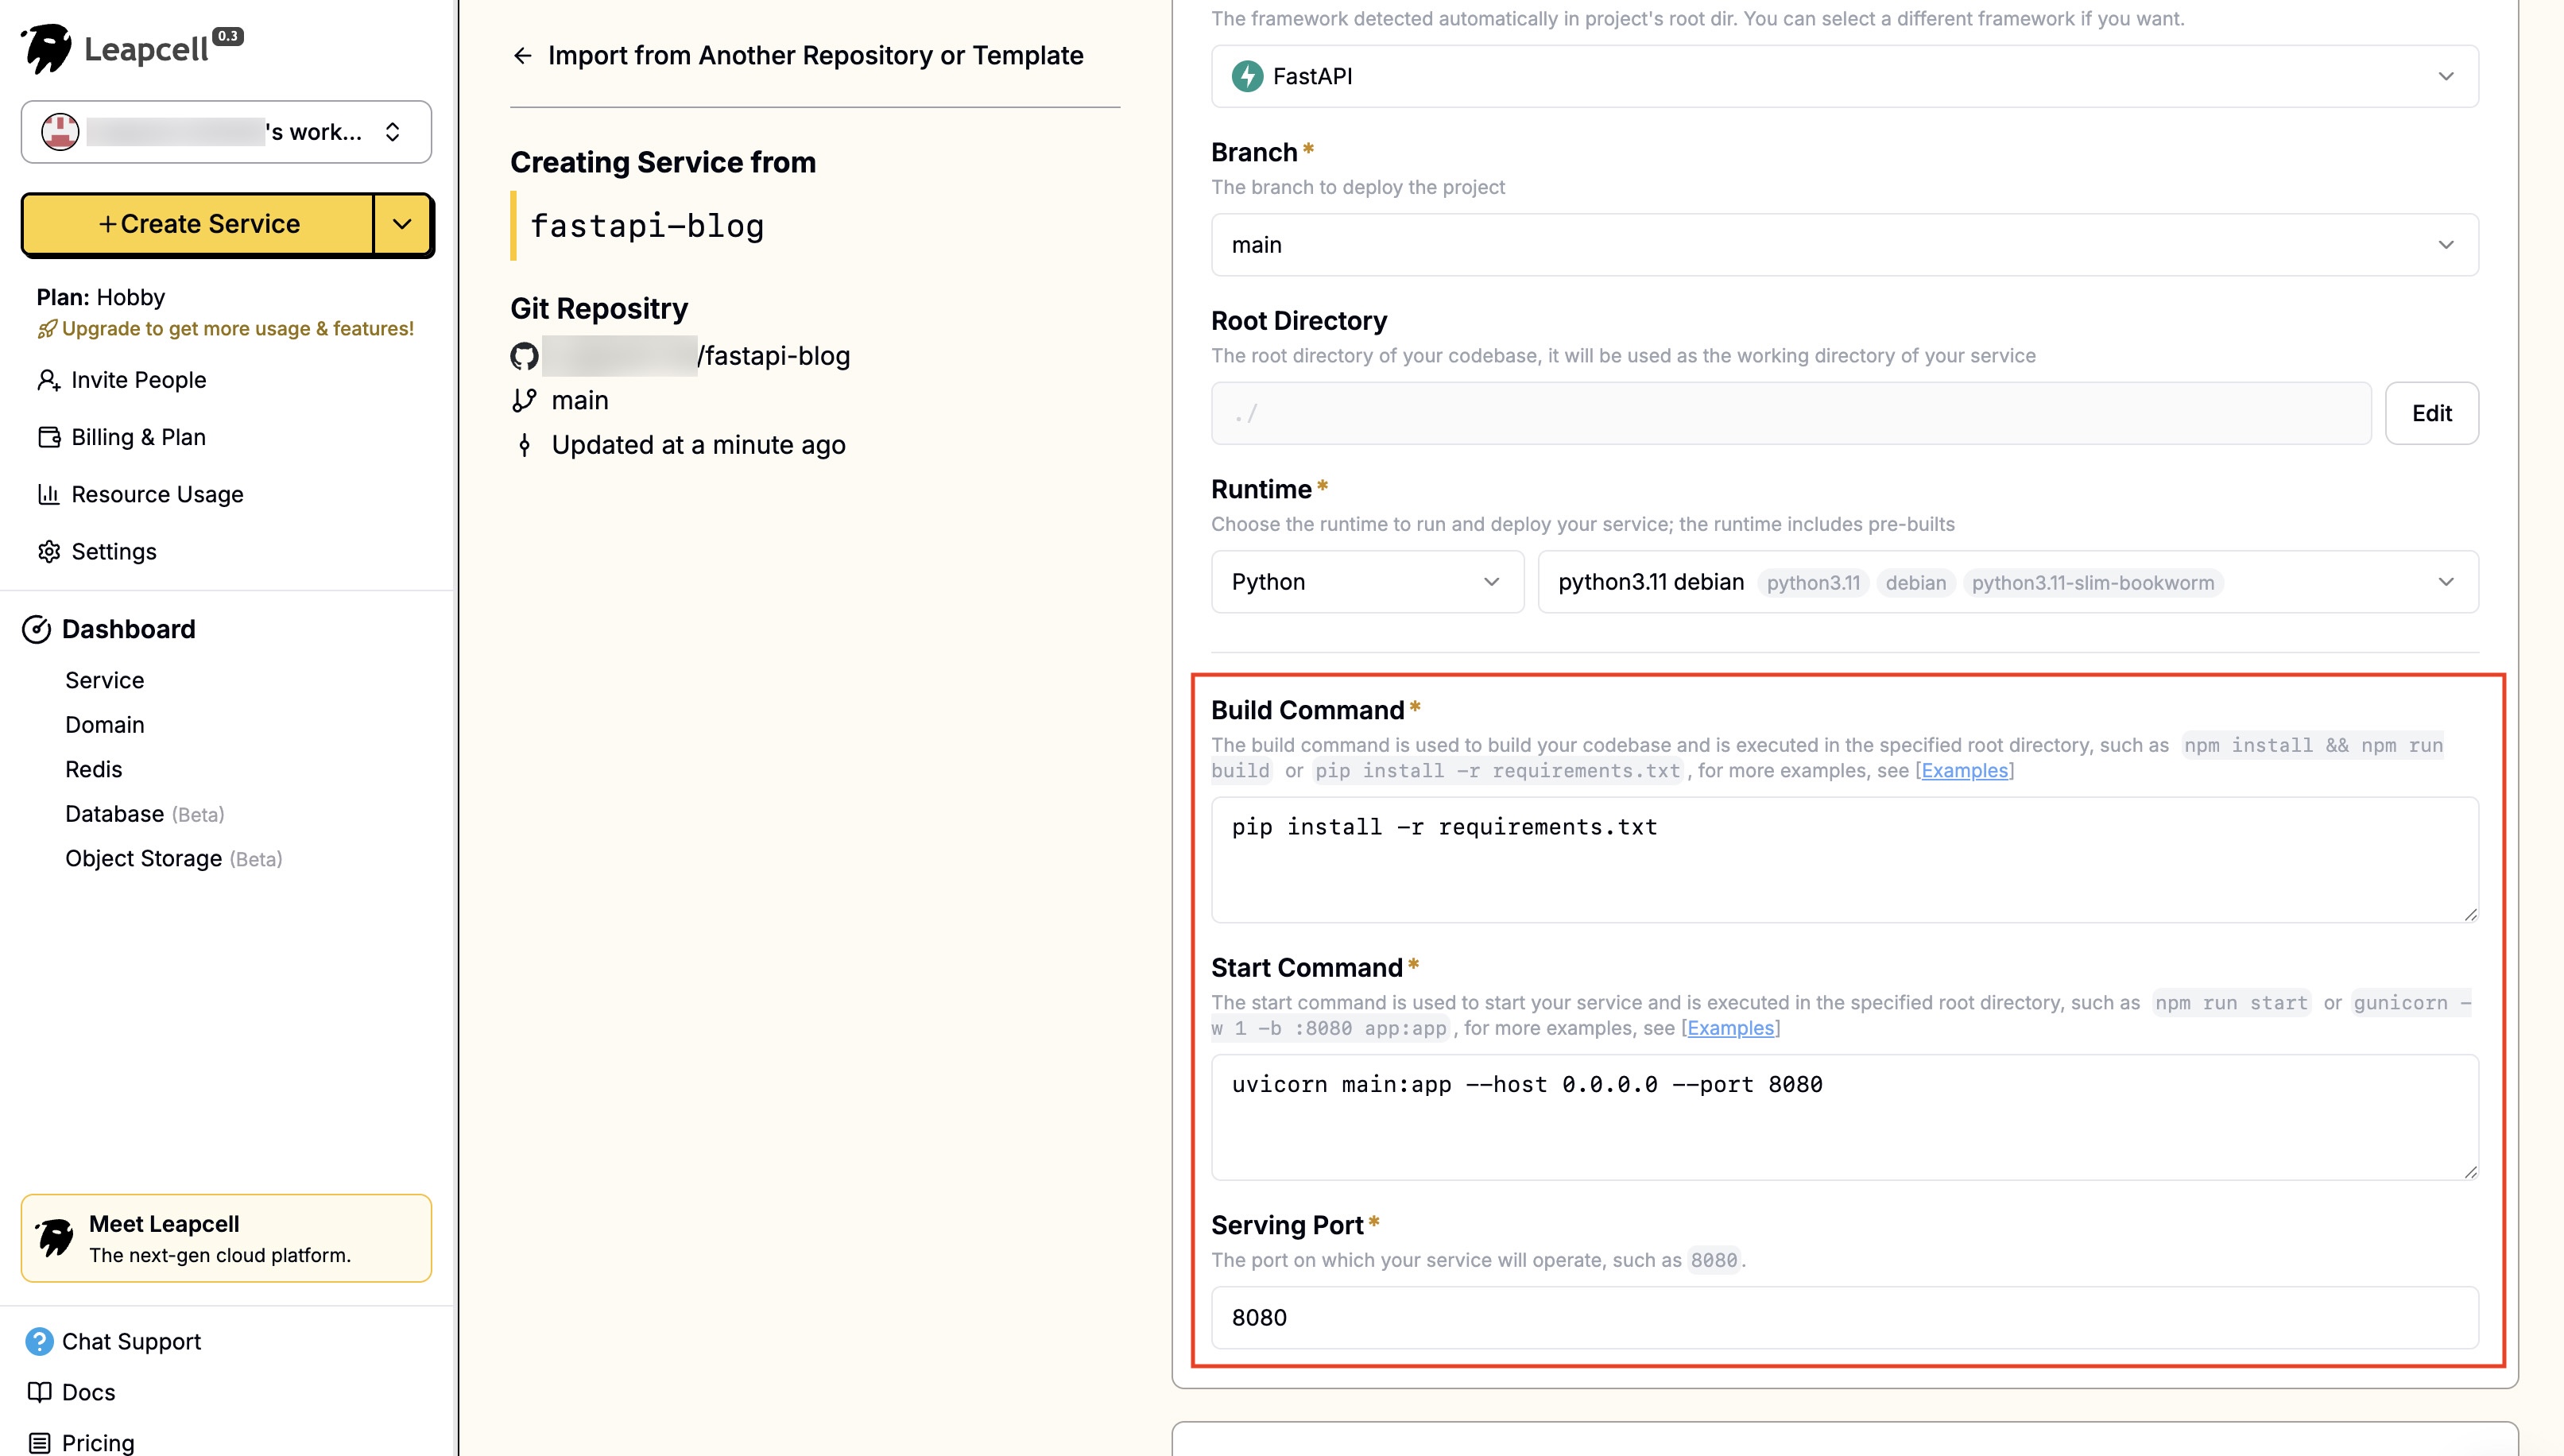
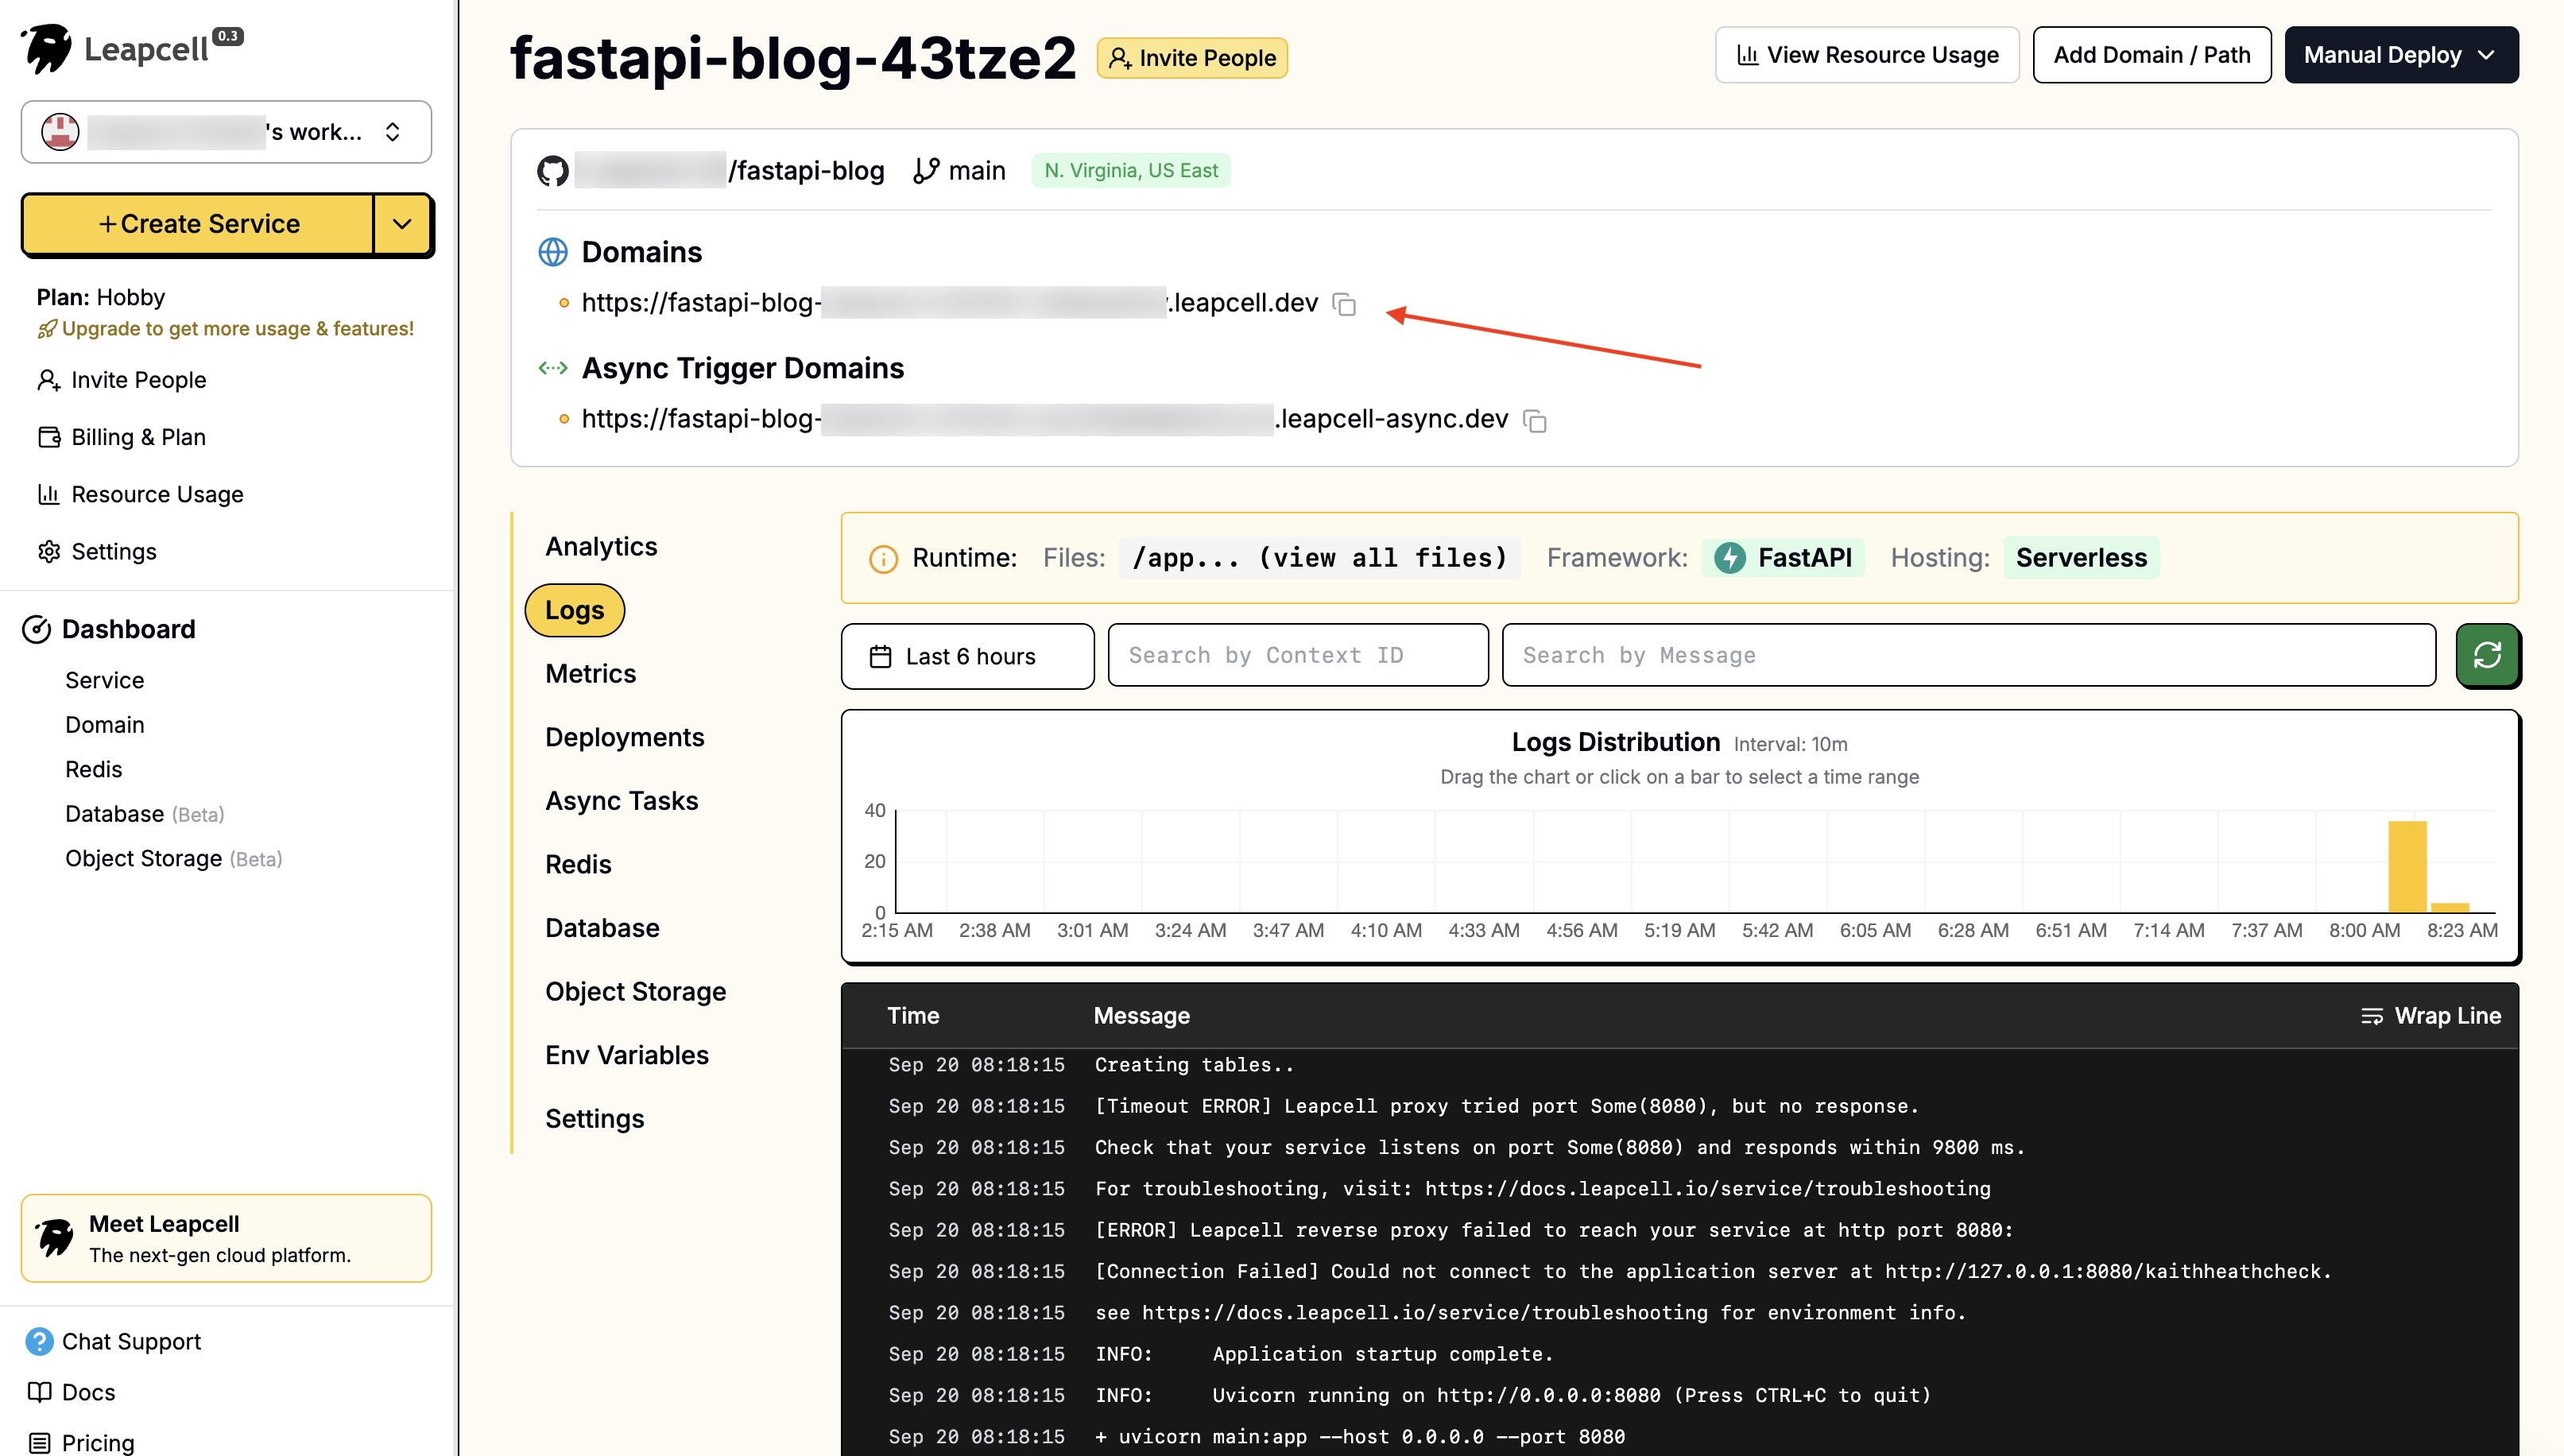
5.Click "Submit" at the bottom to deploy. The deployment will complete quickly and return you to the deployment homepage. Here we can see that Leapcell has provided a domain. This is the online address of your blog.
Summary and Next Steps
With this article, we have implemented the most core feature of a documentation site: dynamic Markdown-to-HTML conversion.
You probably noticed the Python code block in hello.md. Although it was correctly rendered as code, it looks plain, has no color highlighting, and is hard to read.
This is clearly not the experience a documentation site should provide.
In the next article, we will solve this problem: adding syntax highlighting to our rendered Markdown code blocks.